
How to Bulk Send Tokens & NFTs to Multiple Wallets
Welcome to the Metasender Tutorial Guide! Here, we'll walk you through the essential steps to efficiently use Metasender for distributing ERC20 tokens across the Avalanche blockchain. Our platform streamlines the token distribution process, saving you time and resources.


Prepare
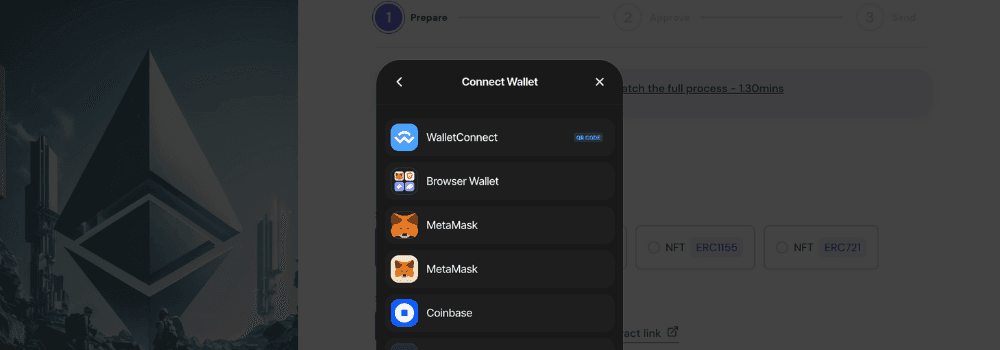
Metasender integrates Web3 modal, enabling you to connect with various wallets including Metamask, WalletConnect, and others. Easily link your preferred wallet to start using Metasender.
Explore four comprehensive options to meet all your asset transfer needs:
Token - Native: Use this option to send the blockchain's primary currency, such as ETH for Ethereum.
Token - ERC20: Suitable for all tokens crafted on a particular blockchain framework.
NFT - ERC1155: Ideal for sending NFTs that allow both fungible and non-fungible token types in a single contract.
NFT - ERC721: Perfect for unique, non-fungible tokens, ensuring each item is one-of-a-kind.
If you're uncertain about whether your NFTs are ERC1155 or ERC721, a simple check on OpenSea can clarify. Find a specific NFT from the collection in question on OpenSea, then navigate to the 'Details' section.
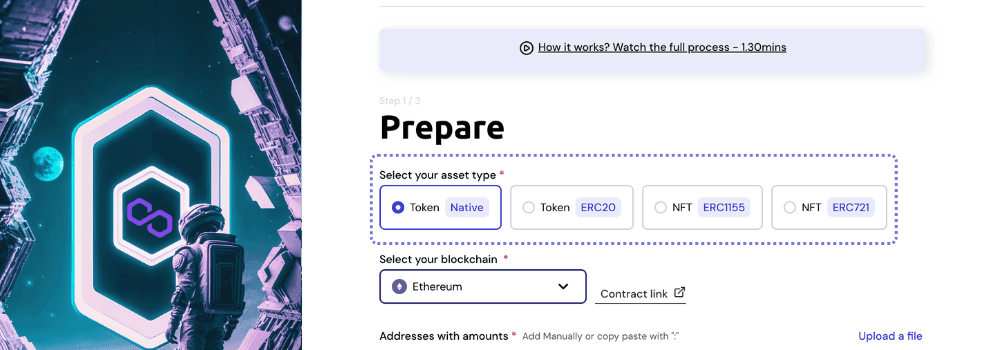
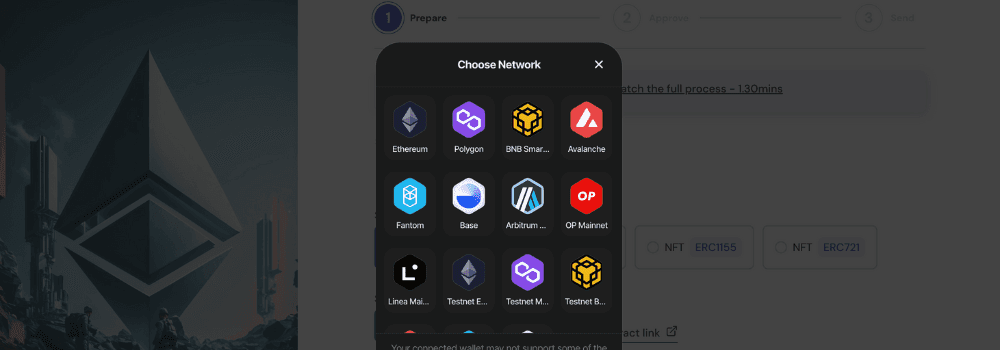
Metasender contracts are available on Ethereum, Polygon, Binance Smart Chain, Avalanche, Fantom, Base, Arbitrum, Optimism, Linea, and their respective testnets. Select the blockchain where you intend to send your assets.
To facilitate the multi-send of NFTs, tokens, etc., Metasender requires the contract address of the asset. This can typically be found on blockchain explorers like Etherscan for Ethereum assets, or on NFT marketplace websites such as OpenSea for NFTs.
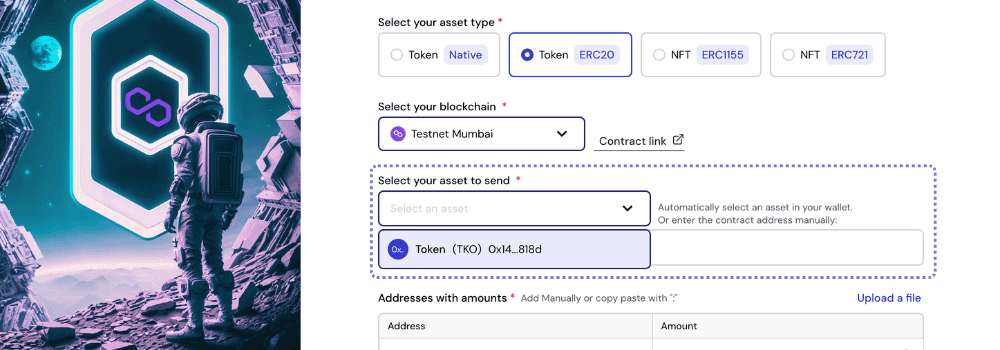
Automatic detection:
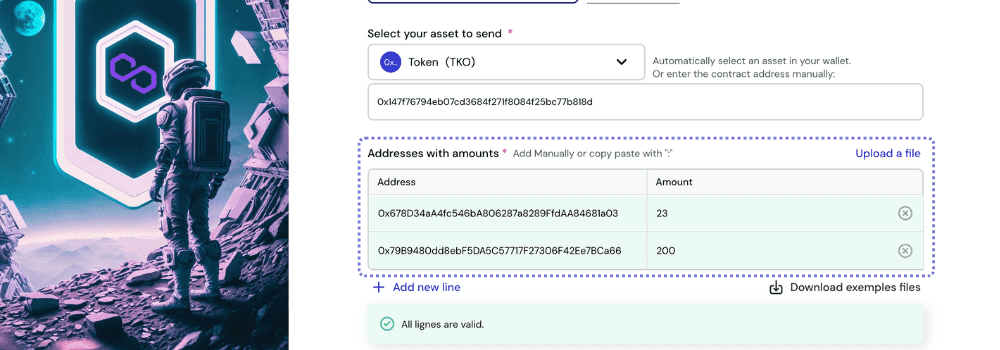
Understanding the challenge of this step, Metasender is designed to automatically detect the assets in your wallet and present them to you. Simply choose the asset you want to send, and Metasender will automatically populate the contract address for you.
You can input recipient addresses and associated details manually or by using the import function available in the app. An example format can be downloaded within the app for guidance.
The information required in the address tab varies depending on the type of asset:
Token - ERC20 or Native: This is straightforward; simply enter the addresses you wish to send your token to, followed by the amount for each recipient.
NFT - ERC721: For each recipient address, you must specify the ID of the NFT to be sent.
NFT - ERC1155: Similar to ERC721, you need to enter the recipient addresses and ID, but also specify the quantity of each NFT you wish to send.
After entering all required information, take a moment to review what you're about to send. Then, click 'Approve' to proceed.
An initial estimate of gas fees plus Metasender fees will have been provided, but you'll find more detailed information on the 'Approve' page.
Note: It's easy to navigate back to the 'Prepare' stage from the 'Approve' page without losing any entered data.
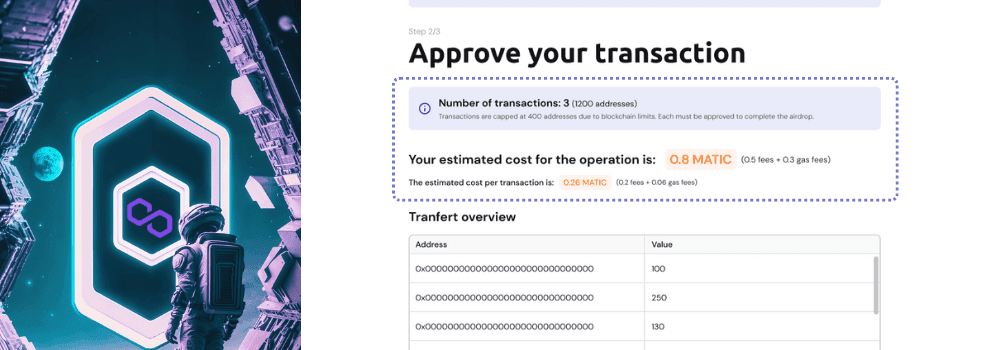
Approve
Review: On this page, you can scrutinize the recipient addresses along with detailed amounts designated for each.
Split: Should your batch transfer include more than 400 addresses, our system will automatically divide them into multiple transactions due to blockchain address limits, capping each at 400.
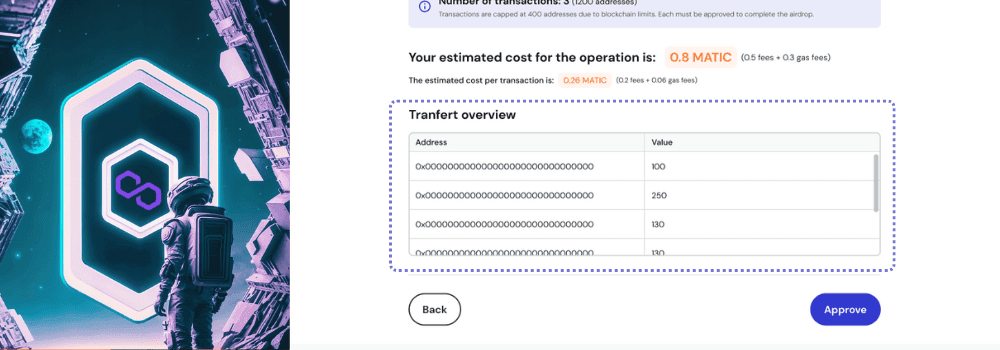
Costs: An estimated cost for the entire operation will be provided, breaking down the expenses per transaction, including Metasender fees and gas fees. Our pricing is highly competitive.
Use the fee estimator on the home page to get the exact cost for your batch before you start.
Keep in mind, gas fees can fluctuate, but we aim for the utmost accuracy in our estimates.
Ready to proceed? Click the "Send" button. A loading screen will appear, and your wallet will prompt you to authorize the connection. The Metasender contract requires access to the assets you're sending.
NOTE: We only request access to the specific assets and quantities you intend to send, nothing more.
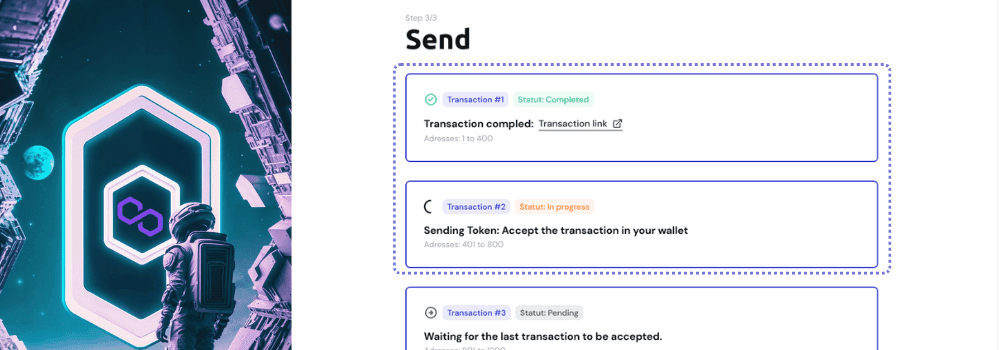
Send
This is the final step to finalize your asset sending process.
After establishing a connection with your wallet, you will be prompted to confirm the transaction. Once confirmed, your assets begin their transfer journey:
Status Update: The status will initially display as "In Progress".
Completion: Upon transaction finalization, the status updates to "Completed", and a transaction link is provided to you for tracking.
For batch sends that necessitate multiple transactions, each one requires separate confirmation. You may notice several confirmation pop-ups from your wallet—this is expected and part of the process.
If you have reached this stage, you've successfully completed a batch asset transfer to multiple addresses with Metasender.
Should you have any further questions, please refer to our FAQ page or reach out to us for assistance.
Multisend your assets now
With MetaSender, send thousands of tokens or NFTs to multiple addresses in a single click. Secure, efficient, and ready to go whenever you are.
Just Connect your wallet, select your blockchain, and send your assets.